How to create IZArc toolbar skins
IZArc allows you to use "skins" to customize its appearance. Creating a skin for IZArc is extremely easy, and best of all, anyone can do it. Read on for simple instructions and begin designing your IZArc masterpiece!
Required tools:
- Windows Vista/7/8/10/11
- Display set to high-color (16-bit) mode or better
- Bitmap editor (e.g. MS Paint, JASC Paint Shop Pro, Adobe Photoshop)
- IZArc Skin Builder
Creating your skin:
Step one
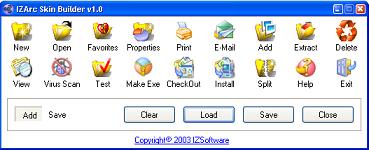
Create 18 bitmap (.gif) images with width 32, height 32, and maximum colors 24-bit for following actions (buttons):
1. New
2. Open
3. Favorites
4. Properties
5. Print
6. E-Mail
7. Add
8. Extract
9. Delete
10. View
11. Scan
12. Test
13. Make EXE
14. CheckOut
15. Install
16. Split
17. Help
18. Exit
Note: Do not forget that all images must be transparent. Use a magenta red (255,0,255) for the background.
Step two
Open IZArc Skin Builder
Step Three
Click on the "New" button
Browse to directory where you have saved those bitmap images.
Select a BMP file for the "New" action and press the "OK" button.
Repeat this process for other buttons (Open, Favorites, etc.).
Step Four
Click on the "Save" button to save the new skin.
Submit Skin
Now that you have created your IZArc skin,
send it to us with a short comment to add it to our archives.

